之前用OC的时候,第三方库一直用CocoaPods管理和集成,现在用Swift开始用Carthage来做
Carthage本身就是用Swift写的,相比CocoaPods就我使用感受
- 本身是去中心化的,CocoaPods每次更新比较耗时,版本不一致可能导致第三方库版本不一样,库的发布者必须发布到CocoaPods上,Carthage是直接依托于github
- 没有改变项目工程的目录结构,只关心最基本的操作,集成纯Swift项目编译速度比较快
- 缺点是第三方库资源没有CocoaPods多,每次配置完了还要手动写一些配置
Carthage安装
$ brew install Carthage安装完了可以看到版本信息
$ carthage version
0.32.0
也可以升级以前安装的版本
$ brew upgrade carthage
The `brew link` step did not complete successfully
The formula built, but is not symlinked into /usr/local
Could not symlink etc/bash_completion.d/carthage
Target /usr/local/etc/bash_completion.d/carthage
is a symlink belonging to carthage. You can unlink it:
  brew unlink carthage

To force the link and overwrite all conflicting files:
  brew link --overwrite carthage

To list all files that would be deleted:
  brew link --overwrite --dry-run carthage
我升级的过程中出现了一些错误,提示没有brew没有连接上,手动链接
$ brew link --overwrite carthage
Linking /usr/local/Cellar/carthage/0.32.0... Error: Permission denied @ dir_s_mkdir - /usr/local/Frameworks
继续提示错误没有目录权限,执行创建目录
$ sudo mkdir /usr/local/Frameworks
$ sudo chown $(whoami):admin /usr/local/Frameworks
这次没有错误了,继续手动link
$ brew link --overwrite carthage
Linking /usr/local/Cellar/carthage/0.32.0... 4 symlinks created
没有报错了,到此已经升级完毕了
Carthage使用
1.进入工程目录,然后创建Carthage文件
$ cd project path
$ touch Carthage
2.打开Carthage文件,填写依赖,下面2种方式都可以
github "onevcat/Kingfisher" ~> 5.0
git "https://github.com/onevcat/Kingfisher.git"
3.保存Carthage文件,clone源代码,platform参数表示编译的平台,不添加参数会默认编译多个平台
$ Carthage update --platform iOS安装完毕之后会发现工程目录多了一些文件
├── Cartfile	//安装的依赖列表
├── Cartfile.resolved	//依赖文件的版本类似于Podfile.lock
└── Carthage	//自动生成的目录,可以添加到.gitignore
    ├── Build	//编译后的framework
    └── Checkouts	//git上拉取的依赖源文件
4.配置工程
- 打开项目,点击
Target -> Build Phases -> Link Library with Libraries选择Carthage/Build目录中要导入的framework - 添加编译脚本
/usr/local/bin/Carthage copy-frameworks - 增加Input Files
$(SRCROOT)/Carthage/Build/iOS/Kingfisher.framework
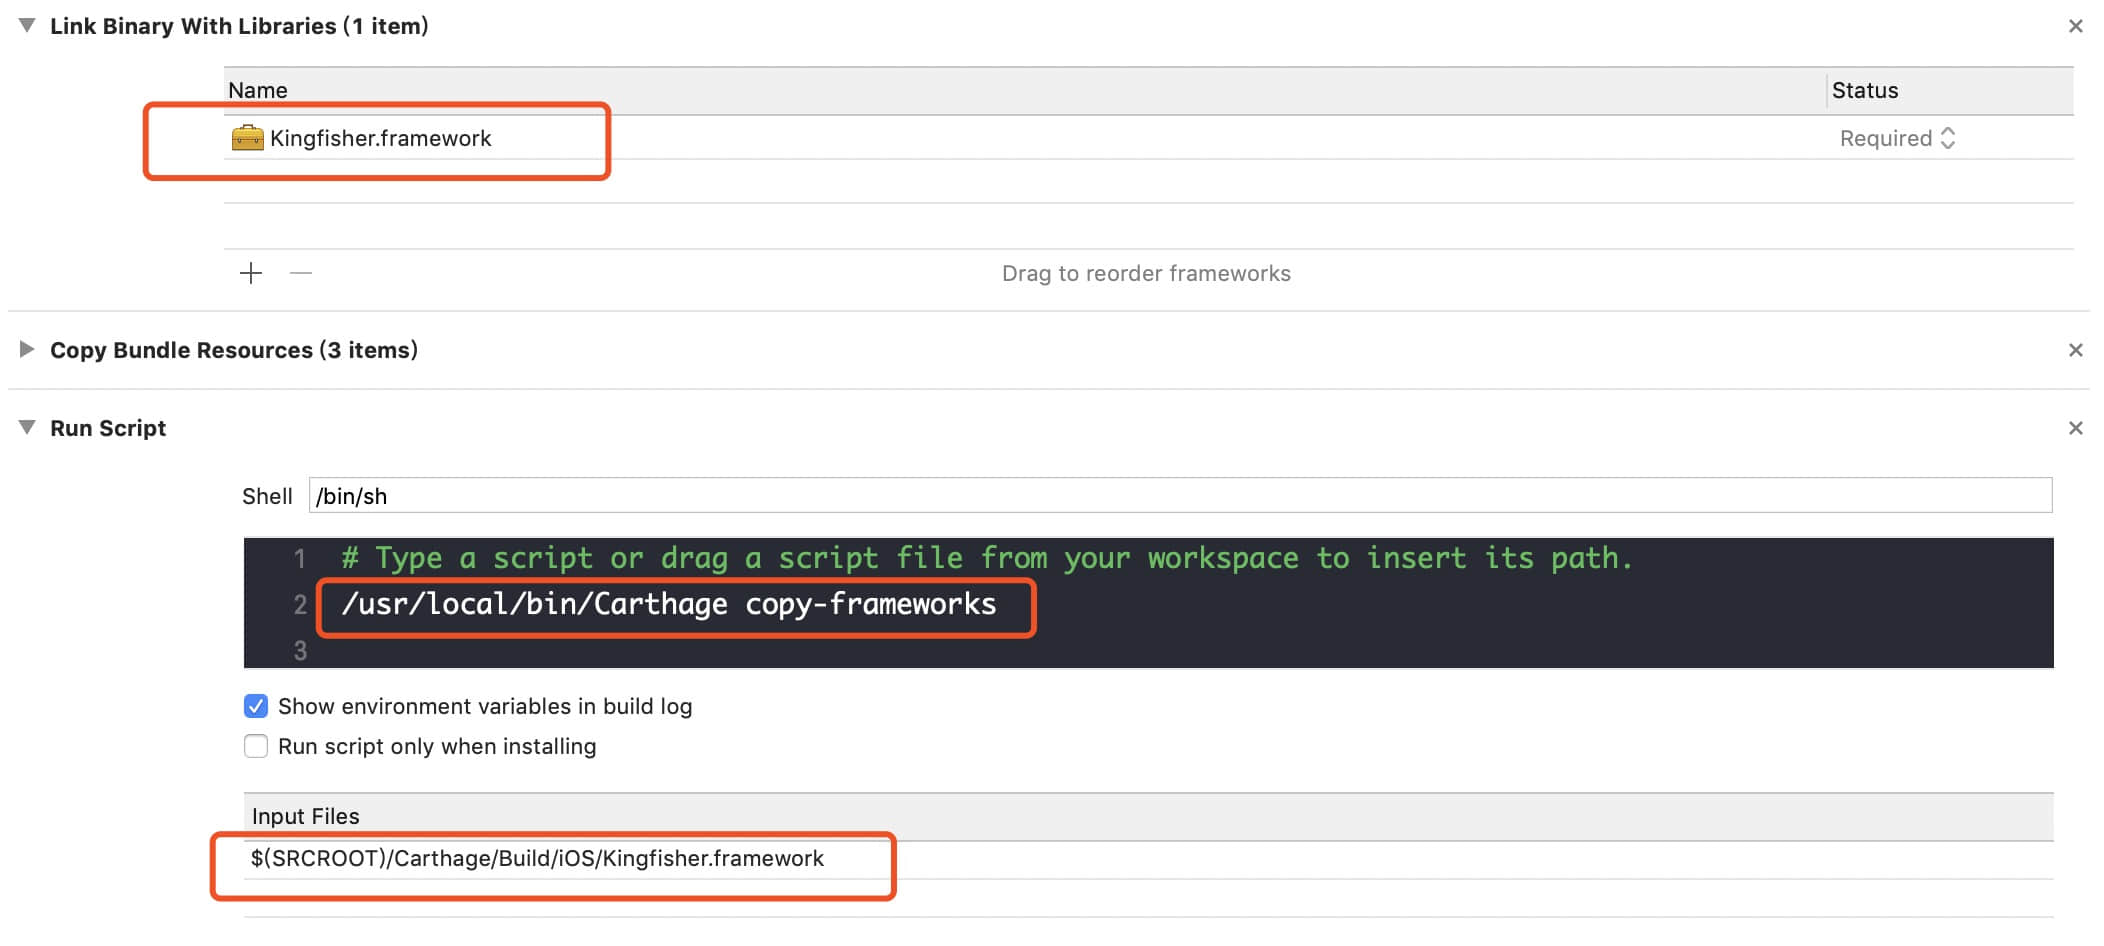
在工程中需要用到的地方import Kingfisher就可以了,以后添加了其他依赖,都需要carthage update,然后手动link到Libraries,增加Input Files
Carthage还有一些其他的用法,具体的可以到github主页上去看